Who this is for: Staff signing in to a new or newly set up laptop for the first time.
Why the extra steps? The laptop isn't connected to the company network yet, so it can't verify your account. You first connect to Wi-Fi, then use the network sign-in option to log in.
Step 1: Wake the lock screen
Press any key or click the mouse on the lock screen (the blue screen showing the time and date). The sign-in screen will appear.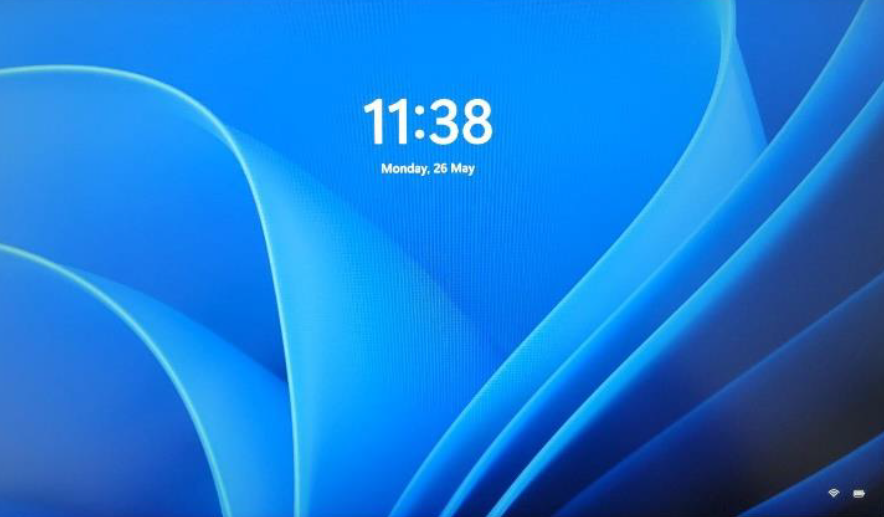
Step 2: Open the Wi-Fi menu
In the bottom-right corner, click the Wi-Fi icon.
Step 3: Connect to CCS-Guest
Select CCS-Guest from the list and click Connect. Wait until it shows "Connected, secured."
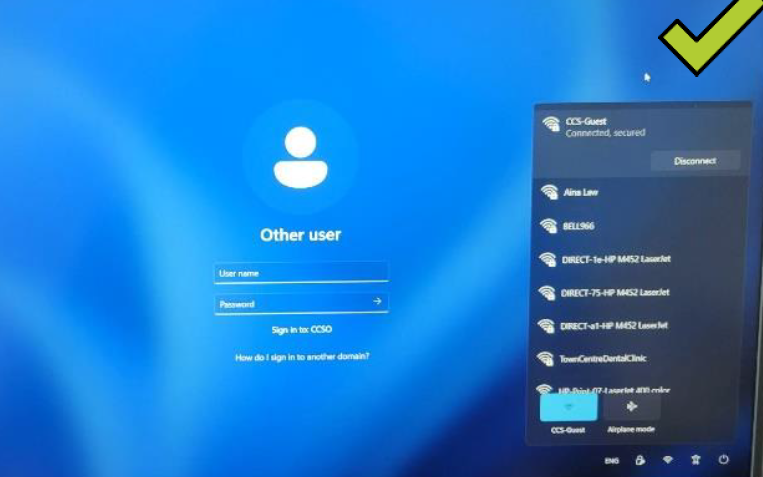
Ignore the other networks in the list (printers, clinics, etc.). Only use CCS-Guest.
Step 4: Choose Network Sign-in
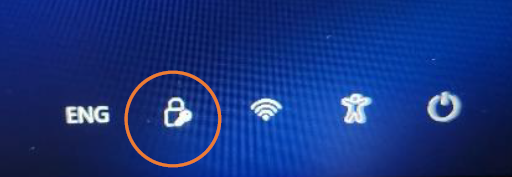
In the bottom-right corner, click the lock-and-key icon, just to the left of the Wi-Fi icon. This switches the screen to network login.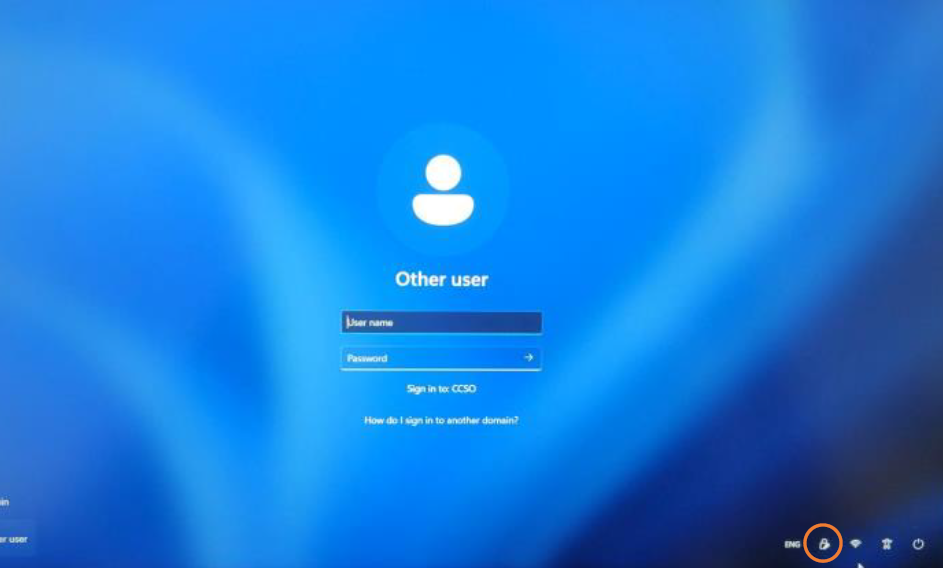
Step 5: Sign in with your company account
On the CCS SSTP screen, enter your username and password, then press Enter or click the arrow.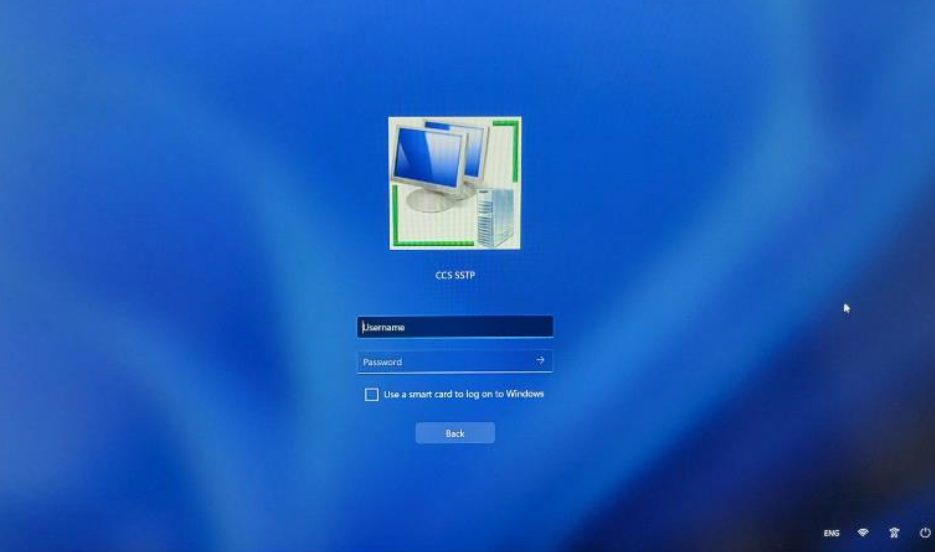
Leave "Use a smart card to log on to Windows" unchecked.
Troubleshooting
- Can't see the lock-and-key icon? Make sure you're on the sign-in screen, not the lock screen (Step 1).
- Login fails? Check that Wi-Fi still shows "Connected," then re-enter your username and password carefully.
- Still stuck? Contact IT support at itsupport@ccscan.ca or https://support.ccscan.ca
Was this article helpful?
That’s Great!
Thank you for your feedback
Sorry! We couldn't be helpful
Thank you for your feedback
Feedback sent
We appreciate your effort and will try to fix the article